I said goodbye to summer last week and there was no better way to do it than with a celebratory dinner to  at my favorite Jersey Shore restaurant – The Beach Creek in Wildwood. I recently did a post about the Beach Creek, but had to share some photos of my recent dinner there. As always, the service was fantastic, the food was fresh and perfect – and the decadent homemade desserts the staff generously sent ove were AMAZING! ๐Ÿ™‚

The Beach Creek is open until Columbus Day weekend and will re-open for next season in May.

14 ounce broiled Australian lobster tail.
Maryland crab cakes.
Mahi Mahi.
Cheesecake.
Creme brulee.
Until next summer, XOXO!

Here’s another easy recipe to use up that summer zucchini squash. It’s a cross between a tart, pizza and quiche. It’s fast, easy and looks pretty. ๐Ÿ™‚ It’s zucchini in a hot, cheesy and crusty shell.  I baked mine in a tart shell so that’s why it looks flat, If you want it to be thicker, use a glass pie dish. This will also ensure that the crust gets crisp.  If you want to make it lighter, use a whole wheat organic crust instead of the Pillsbury pie crust. Click here to see some of the other quiches I’ve made with whole wheat crusts.

Fairytale Zucchini Pizza
(Serves 4-6)

Ingredients:
1 Pillsbury pie crust
1 large zucchini, sliced thinly (about 4 cups)
1 tbs olive oil
salt and pepper
3 eggs
1 cup of 1% milk
1/4 cup of grated Parmesan cheese
2 cups of shredded Cheddar cheese

Directions:
Preheat the oven to 350 degrees. Unroll and press the Pillsbury pie crust into a pie dish or tart dish. In a large frying pan, heat the olive oil. Saute the zucchini on medium-high until translucent and soft. Season with a little salt and pepper. Remove to a paper-towel lined plate to absorb the grease and let cool for a few minutes.

Whisk the eggs and milk together in a small bowl and set aside. Sprinkle some Parmesan cheese on the bottom of the crust. Layer half of the zucchini on the bottom. Add half of the shredded cheese. Make another layer with the remainder of the zucchini. Spread the rest of the shredded cheese on top. Pour the egg and milk mixture over the zucchini.

Bake for 40 minutes or until a toothpick comes out clean. For a crusty bottom, place on the bottom rack during the last 10 minutes of cooking. Cover the top of the pizza with a piece of tin foil if it starts to get too brown.

Enjoy! ๐Ÿ™‚ 

Three years ago, I wrote about planting my first vegetable garden.  Since then, I’ve gotten more skilled at what I’m doing and I’ve been surprisingly successful in growing a few things, including peppers. (And a total failure in growing others like strawberries – but that’s okay, it’s a learning process!) I had so many long hot peppers and green peppers this year I thought about canning, but I’m too lazy and don’t have time. I’ve made stuffed peppers before  – but these peppers were almost too small for that. 
My friend came to the rescue and suggested I make a jalapeno cheddar bread. She had made one from a recipe she found on Pinterest. I didn’t have any jalapenos but had other hot peppers, so I just chopped them up and threw them in. The result was an highly addictive, spicy, cheesy loaf of biscuit-like bread. (If you like the cheddar bay biscuits from Red Lobster, then you’re going to love this easy to make biscuit bread.)
Just remember to please, please, please wear gloves if you are handling hot peppers. You may not think that they’re hot but I’m telling you – they are dangerous! The oils from the peppers can sink into your skin and burn you when you least expect it (even the next day – I’ve learned from experience!)


Fairytale Cheddar Pepper Biscuit Bread
(Adopted from Homemade by Holman)
Yields 1 loaf.

Ingredients:
2 cups all-purpose flour
2 tsp sugar
1 tbs baking powder
1 tsp freshly ground black pepper
1/2 tsp salt
1 1/2 cups shredded cheddar cheese
1 cup milk (I used 1%)
1/3 cup canola oil
1 egg
3-5 hot peppers, seeded and diced (I used the hot peppers from my hard)
1 large or 2 small green or red peppers, diced

Directions:
Preheat oven to 375 degrees. Spray a loaf pan with non-stick cooking spray.

Combine the dry ingredients in a large bowl (flour, sugar, baking powder, pepper, salt and cheese) and mix together with a wooden spoon. Make a well in the center of the dry ingredients.

Combine the wet ingredients in a separate small bowl. Poor into the well of the dry ingredients. Lightly stir together until well blended. Pour into loaf pan. Bake in the oven for 40-45 minutes. Remove from oven and let cool for a few minutes. Use a knife to take the loaf out of the pan. Serve immediately, or let cool completely before covering to retain the crispness.

I also made a spicy pepper soup I adopted from a Cooking Light recipe for poblano and corn soup. I adopted it to use my own mix of peppers and this is the result. Be warned, this is SPICY and not for the faint of heart. 

Fairytale Hot Pepper and Corn Soup
Serves 4
Adopted from Cooking Light

Ingredients:
1 bag of frozen corn
2 cups of 1% milk
4 hot peppers, seeded and diced
1 cup of chopped onion
3/4 tsp salt
1 cup of reduced fat shredded cheddar cheese

Directions:
Place the onion and chopped peppers in a microwave safe bowl and cover. Microwave on high for 4 minutes. Add to a dutch oven with the corn and milk. Bring mixture to a boil over medium heat. Using a hand immersion blender to puree the whole soup. Add in 1/2 cup of cheese and salt and stir until blended. Serve with remaining cheddar cheese sprinkled on top. Also good with crumbled tortilla chips on top.

Enjoy!
The harvest moon has arrived and the crispness of autumn has graced the air, bringing with it a cool chill that makes you want to wrap yourself in a blanket and hold a steaming cup of hot chocolate or a nice bowl of thick and flavorful soup. 

But with the arrival of the cold weather will come your body’s constant but natural yearning to consume heartier meals, such as heavy cream-based soups. There are ways to indulge in your favorite creamy soup without consuming excess amounts of calories or fat.  Instead of using heavy cream or full fat milk and butter, you can often use reduced fat milk or a combination of the two.  Another amazing trick which I utilize often is to puree the vegetables so that the soup is thick and creamy but without any added fat. 

Here is simple recipe for shrimp and corn chowder with bacon. I adopted this recipe from one found in a Cooking Light book. This is a good go-to weekday recipe because it’s simple and fast. The recipe calls for bacon but if you buy the thick center cut, this is the healthiest slice of bacon and the most flavorful. Plus a little bit will go a long way in this dish. 

Fairytale Corn and Shrimp Chowder with Bacon 

Ingredients

  • 4-6  slices of thick center cut bacon
  • 1/2  cup of chopped combined celery, onion, and red bell pepper 
  • 2  (16-ounce) packages frozen baby gold and white corn, thawed
  • 1 bag of frozen baby shrimp
  • 2  cups 1% low-fat milk
  • 3/4  cup  (3 ounces) reduced-fat shredded extra-sharp cheddar cheese or colby jack
  • Handful of chopped chives
  • Salt + Pepper

  • Directions
  • 1. Cook bacon in a Dutch oven over medium heat until crisp. Remove the bacon from pan and blot with paper towels. Crumble and set aside. 
  • 2. Add the chopped celery, onion and peppers plus 1 package of corn to the pan cracklings; sautรฉ 5 minutes or until vegetables are tender.
  • 3. Place remaining 1 package corn and 1 cup milk in a blender, and process until smooth. Add pureed mixture to vegetables in pan.
  • 4. Stir in remaining 1 cup milk, salt, black pepper.
  • 5. Stir cheese and then frozen shrimp. 
  • 5. Cook over medium heat (do not boil), stirring constantly, until cheese melts.
  • 6. Serve with bacon crumbles and chopped chives. 

Enjoy!
If you are looking for an easy dessert to make for your Memorial Day BBQ this weekend, look no further. This dessert is not only delicious, but it is also alot healthier than you may think.  I adopted this cobbler from a Weight Watchers recipe.  It’s VERY simple to make and almost fool proof. The topping has a biscuit-like consistency and combined with the sweetness of the warm berries, it is a very hearty, satisfying and fresh treat!. It’s the perfect kickoff dessert for a perfect summer! 
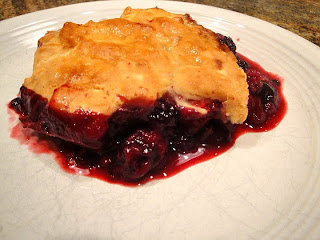
Fairytale Feasts’ Berry Cobbler
Berries:
1 cup blackberries
1 cup blueberries (frozen or fresh)
2 cup(s) strawberries, hulled and halved
1/4 tsp table salt
2 Tbsp cornstarch
1/2 cup(s) sugar (or Splenda)
Biscuit Topping:
2/3 cup(s) all-purpose flour
1 Tbsp sugar (or Splenda)
1/2 tsp baking powder
1/4 tsp baking soda
1/4 tsp table salt
1/2 cup(s) buttermilk
2 Tbsp melted butter or margarine
Optional: Whipped cream or vanilla ice cream, sprig of fresh mint.
 Preheat oven to 400ยบF.   Combine berries, salt, cornstarch and 1/2 cup of sugar in a bowl. Place in shallow 2-quart ovenproof dish. Bake until hot, about 5 minutes.

While berries are baking, prepare biscuit like topping: In a bowl, stir together flour, 1 tablespoon of sugar, baking powder, baking soda and teaspoon of salt. Stir in buttermilk to form a sticky dough. Remove berries from oven. Drop dough by heaping tablespoons onto the berries to form a biscuit like topping. Brush the melted butter over the topping to ensure a golden brown crust. Bake the cobbler until topping is golden and fruit is bubbling, about 25-30 minutes. Remove from oven and let cobbler sit for at least 10 minutes to thicken. Optional: garnish with fresh whipped cream or ice cream and a sprig of fresh mint. Serve immediately!  (Also, I found that this was great the next day heated up in the oven!)

Lady can’t wait for the berry cobbler to cool!!! And she knows good food! ๐Ÿ™‚
Enjoy!